There’s no shortage of amazing images online, but that doesn’t mean you’re always going to find the original. So many images you find on blogs and other websites originated from somewhere else. While it may not seem like a big deal, it seriously pays to know how to find the original.
Here’s how to find an image source quickly and easily.
Why It Is Important to Find Image Sources
It’s always handy to know how to find proper image sources online. It won’t just make your life easier when it comes to finding high-quality photos; it could also help you avoid legal trouble.
You Saw an Image and Want to Find It Again
Is there anything more annoying than seeing a cool image online, saving it to your desktop, and then forgetting where you found it in the first place? Worse still, you then have to waste hours trawling through your browser history to find it.
All of this wasted time and effort can be avoided when you know how to find image sources quickly.
You Want to Use an Image in Your Blog Post and Attribute It Properly
Images are vital when writing blog posts. Research shows articles with photos get 94 percent more views than those without them. That’s because nothing puts readers off more than huge blocks of text. Images help break your writing up, make points clearly and improve the reading experience.
However, you can’t just use any old photo you find on the internet in your blog. You have to make sure you are legally allowed to use it and that you can attribute it properly. You’ll need to find the original image source for both of these tasks.
Once you’ve found the image source, you’ll be able to work out whether you’re allowed to use the image (I help you with this below if you’re still not sure), and you can attribute it correctly if you need to.
While it’s very rare for small sites to get into legal trouble for using copyrighted images or not abiding by Creative Commons, it’s better to be safe than sorry.
You Need a High-Quality Version of an Image
Low-resolution images suck. They look bad on your blog, and they look even worse when you scale them up for printed marketing materials — but pixelated images are exactly what you’ll get if you don’t find the original image source.
Why? Because reposted images are usually shrunk to reduce the file size and increase website load times. This is great for the website in question, but it’s not great for you. The original image, on the other hand, is usually much larger in size. Whether you want to use an image in a piece of marketing collateral or edit it yourself, it pays to be able to find the source.
5 Ways to Find Image Sources
Finding an image source isn’t difficult. Here are five different ways you can use to find any image source today.
1. Use Google’s Image Search to Find Image Sources
Google Images Search is the de-facto place to find images online. You probably don’t need me to tell you that, though. What you may need me to explain, however, is how to use Google Images to find the source of an image.
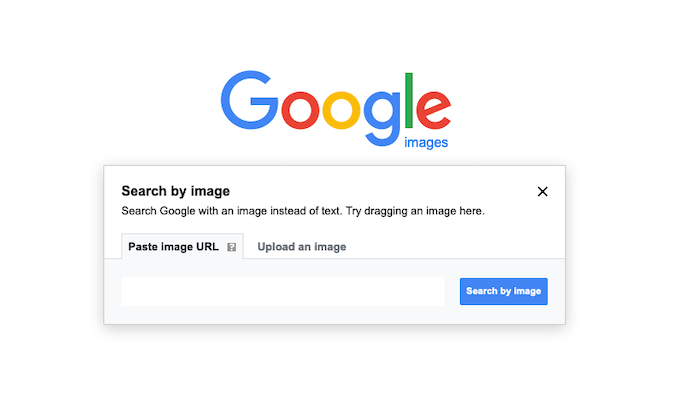
You can do that easily using Reverse Image Search. Head over to image.google.com, but instead of typing in a keyword, upload your image. Google will show a link to every page on the web with that picture, and it shouldn’t be too hard to find the original.
You can even use Google’s Reverse Image Search on your iPhone by requesting the desktop version of the site in Safari.
2. Use Other Reverse Image Tools to Find Image Sources
Ever found an image on Twitter or Facebook and wondered where to find the original image? While it sounds like a tall order, reverse image search tools actually make finding original sources using just the image far easier than you’d think.
All you need to do is upload or copy and paste the image into the tool, and the search engine will find every instance of that image online. In most cases, it won’t be hard to find the original image.
There are plenty of reverse image search tools out there, but here are a couple of my favorites.
TinEye
TinEye is a great reverse image search tool that helps locate an image source in seconds. You can search by uploading a URL if you have one or the image itself.
You can also use TinEye’s Chrome extension to right-click on any image while browsing and instantly get access to the platform’s data.
Search By Image
Search By Image is an Android app that lets you reverse search for images on Google TinEye or Yandex. Search by uploading images from your phone or opening images from Facebook, Twitter and other apps.
3. Look Up the Image MetaData to Find Image Sources
You can find a surprising amount of information about an image in the file’s metadata. Sometimes it will even include the image’s source.
You don’t need to be a technical whiz, either. First, download an image. For the purposes of this example, I’ll be downloading this image from the Good Housekeeping website.

On a mac, you can find the image’s metadata simply by right-clicking on the image and selecting “Get Info.” You’ll be served up a load of data that probably won’t make much sense, but you’ll clearly be able to see the image’s source.
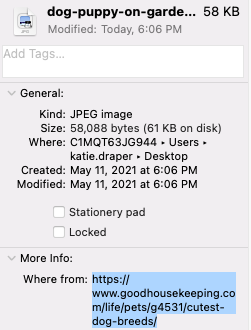
On Windows, just right-click the image and select “Properties.”
4. Use the Chrome Browser to Find Image Sources
If you use Chrome, you don’t need to visit Google Images to do a reverse image search. Instead, right-click on the image when you find one you want to search and click “Search Google for Image.”
You’ll be shown the full reverse image search results as usual.
5. Use Visual Search by Bing to Find Image Sources
Bing has its own image search functionality called Visual Search that makes reverse image searches a breeze.
You can drag your saved image into the search bar or upload it, and Bing will show every location it can find it online. You’ll also get a pretty in-depth rundown of the image’s attributes and any text that Bing can find in the image.
How Do You Attribute Image Sources Correctly?
How you attribute images depends on the type of image and where you found it. Most sites will be very clear about what you need to do when it comes to attribution, but it can help to know the following terminology.
Creative Commons Images
This nonprofit organization allows the use and sharing of images and other creative materials through a series of licenses. Some won’t require attribution at all, some will let you edit images, and some will be incredibly strict.
Attribution is a legal requirement of Creative Commons images unless the image has been published under a Creative Commons Zero (CC0) license. The Creative Commons outlines clearly what it classes an “appropriate credit” using the TASL method. You’ll need to include the following details:
- title
- author
- source
- license
Here’s an example from Creative Commons that shows exactly what they mean.
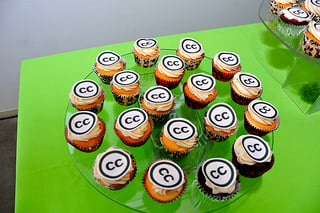
“Creative Commons 10th Birthday Celebration San Francisco” by tvol is licensed under CC BY 2.0”
If you alter a Creative Commons image, you must include the changes in the attribution.
Public Domain Images
When work is listed in the public domain, it means the copyrights to it have expired. It is free to use, share, and edit. You don’t need to attribute the image at all or ever reference the original source.
Royalty-Free Images
Royalty-free images usually aren’t free. Rather, you have to pay a fee to use the image once, but are then free to use it again as many times as you like without paying royalties. That’s what the royalty-free part means.
Royalty-free images usually don’t require attribution, but be sure to check the licensing agreements of the site you downloaded them from. There may be other restrictions, too, like not using them for a certain purpose or in a certain niche.
5 Sites to Find Great Images
The costs of paying for images every time you use them quickly adds up for small businesses. It simply isn’t a sustainable practice. That doesn’t mean you have to go without images, however.
There are plenty of places online to find high-quality royalty-free images. Here are a few of my favorites.
Unsplash
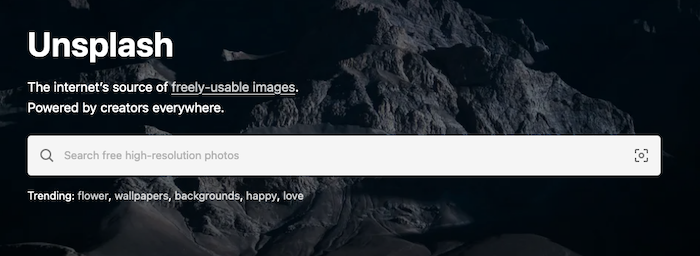
Unsplash is probably the best stock photo platform in the world. You can use the images for free in almost any way you like.
Pexels

Pexels is another large, free stock photo platform like Unsplash. It has its own license that governs what you can and cannot do with photos.
Burst

Burst is Shopify’s stock photo platform. You can download photos for free without being a Shopify customer.
Flickr

Flickr is a fantastic image repository where you can find thousands of images to use for commercial purposes for free.
Canva
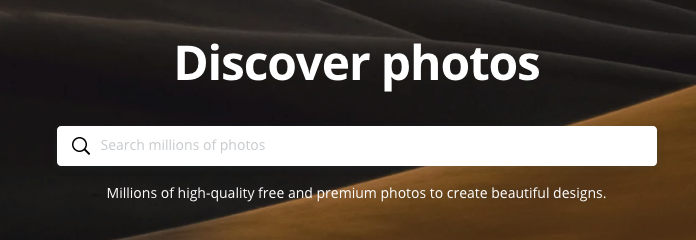
You may have used Canva to create a new logo or poster, but did you know it also has hundreds of free stock images you can use, too? You don’t even have to edit them to download them.
Conclusion
Finding an image source can seem like a lot of work, but it’s well worth it to find a high-quality image or protect your site from legal issues. Use any one of the five strategies I list above, and you’ll be sure to find the original source of just about any image you can find online.
Once you’ve found your image, make sure you are using it in the best possible way on your blog or are using the best editing tools if you want to make the image even better.
Where do you find your favorite images?
How to Find Image Sources For Proper Attribution or Research
Publicado Primeiro em Neil Patel
Nenhum comentário:
Postar um comentário